
When it comes to setting up electrical services, clarity is key. So, let’s delve into the process of installing the 50-amp 120/240-volt 3 pole 4 wire grounding service. But before we dive in, it’s absolutely essential not to confuse this with the older appliance 50-amp 3 wire 120/240-volt service (10-50R). We’re talking about a 50-amp service with four wires that carry two 120-volt hot feeds. There’s a common misconception that the 50-amp RV service is some sort of specialized setup. In truth, it’s a standard 120/240 50-amp 3 pole configuration with four prongs, serving a multitude of applications.
Now, let’s talk about the parts you’ll need to get started:
- DOUBLE POLE 50-Amp 120/240-Volt Breaker
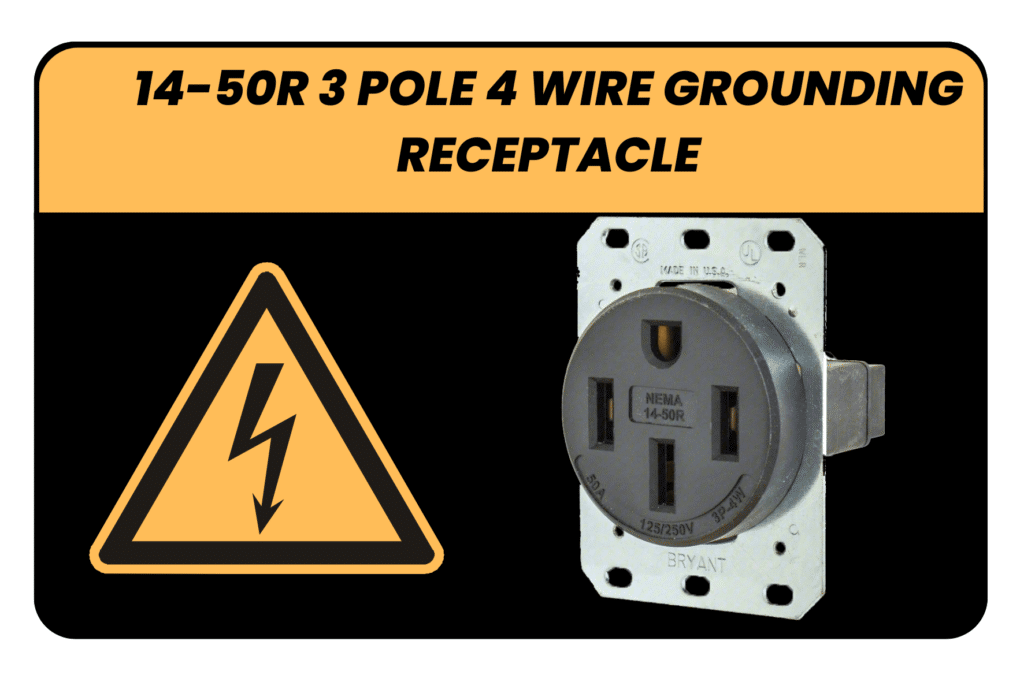
- 1 14-50 Receptacle
- 2 Hot Wires, 1 Neutral Wire (White), and 1 Ground Wire – All Correctly Sized

You can find a large selection of RV receptacles and pedestals at outdoorsiness.com. Specifically, the 50/30/20 amp, 50/20 amp or 50 amp receptacle.
To understand the wiring, visualize it like this:
- The half-round or U-shaped connection is the ground.
- The connection right below the ground is the neutral (white).
- The other two black wires are the hot wires, and they’re 180 degrees out of phase with each other. These are the 120-volt hot wires that provide power.
It’s important to note that in reality, you’re working with two 120-volt split services that combine to provide 240 volts of power to your RV. The X and Y wires are interchangeable, while the red and black (or two black) wires represent the hot (live) connections. One wire goes to X, and the other to Y. On the other hand, the neutral (white) and the bare ground wire have their designated connections.
Here’s where caution comes into play: It’s absolutely crucial that any new installations are checked using a voltmeter. The voltage between X and Y should read 240 volts, between X and W should be 120 volts, Y and W should be 120 volts, X and G should be 120 volts, Y and G should be 120 volts, and W and G should show 0 volts. Always perform these checks on all outlets before plugging in your RV for the first time to ensure everything is in order.
Now, from this common service setup, you have the capacity to draw up to 12,000 watts. To give you an idea of the recommended wire sizes:
- For a 25-foot run, opt for #8 wire.
- For a 50-foot run, #6 wire is suitable.
- And for a longer 100-foot run, consider using #4 wire.
Remember, these recommendations can vary depending on specific circumstances, so adjust as needed. The bottom line is that before plugging in your RV, it’s an absolute must to thoroughly check out the new installation to ensure safety and proper functionality. With these guidelines in mind, you’ll be well-equipped to handle the installation of your 50-amp 120/240-volt 3 pole 4 wire grounding service with confidence.


