How To Test an RV Pedestal With a Multimeter
Before you plug your RV into a pedestal, use a meter to ensure proper voltage and polarity levels. It’s easier than it sounds! To help guide you through the process, I created this diagram showing all of the correct readings for an accurately wired pedestal. If The voltages fall below 105 volts or exceed 128 volts, there may be issues with the campground power supply that could cause damage to your vehicle or even create dangerous hot-skin voltage conditions.
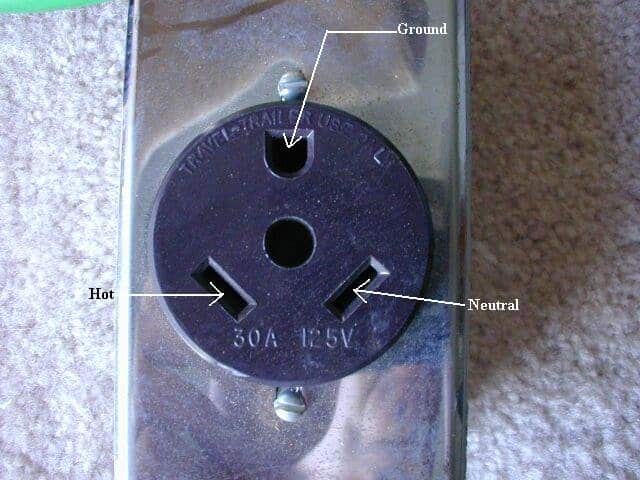
RV owners need to understand the importance of a 30 amp RV outlet, which outputs 120-volt electricity through both a three-prong male wire and 30-amp breaker. When it comes to testing this service, it’s essential that you utilize transitional terminology in order to guarantee accurate results. This helps mark the start and end points of your test properly for more reliable outcomes.


To test a 30-amp RV outlet with a multimeter follow these steps:
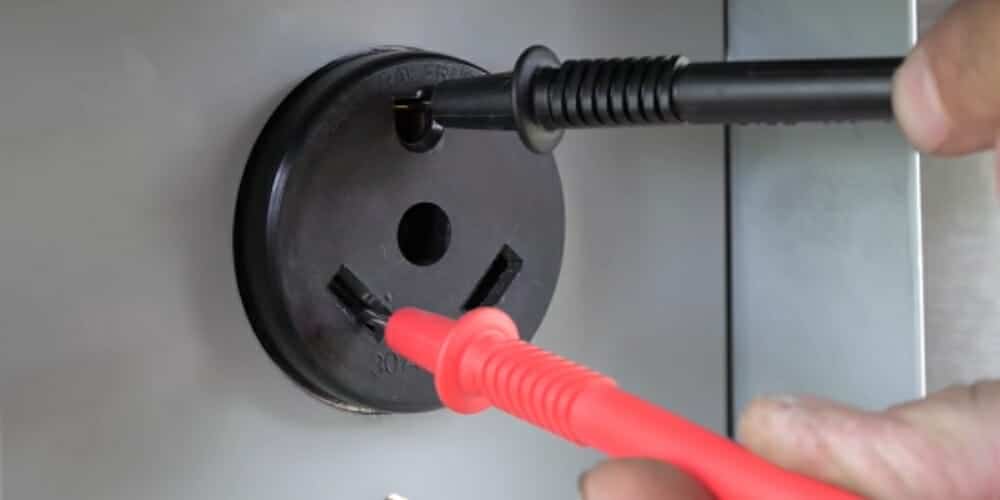
- With the circuit breaker turned on, place the black probe in the half-round (ground) slot and insert the red probe into its corresponding rectangular (hot) slot.
- Confirm the multimeter readings.
- Insert the black probe into the ground slot and then move the red probe to the common slot.
- Once more, take note of the multimeter reading.
Step 1. Circuit Breaker Switch
For further testing, keep the circuit breaker in its “on” position and insert the black probe into the half-round (ground) slot.
Step 2: Solid Ground Connection
Insert the red probe into the left rectangular (hot) port and ensure that it reads between 115-120 volts, signaling a secure ground connection as well as correct polarity.
Step 3: Ground Slot
Keep the black probe in the ground slot.
Step 4: Right (Common) Slot
Move the red probe to the right common slot. A successful transfer should result in no reading between common and ground slots, otherwise abstain from connecting any further if a required outcome is not achieved.


